How to Customize detail view layout
You can customize detail view by setting the layout of entity properties and design elements.
To customize detail view layout
1. Log on to your database in Configurator.
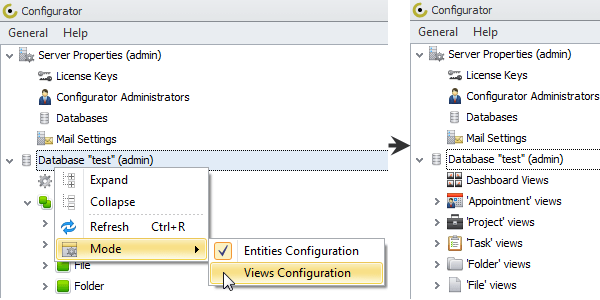
2. Right-click the database, point to Mode, and then click Views Configuration.
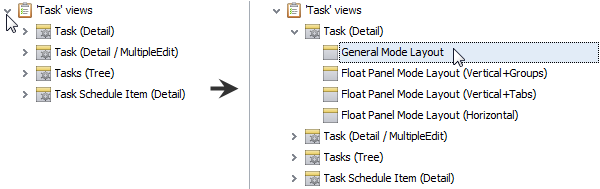
3. Click the right-pointing arrow next to required entity views, click the right-pointing arrow next to required entity detail view, and then click the layout you want to customize.
4. Click Layout.
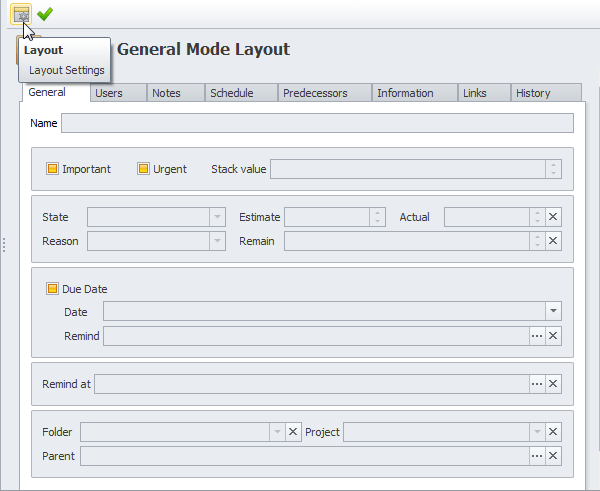
Entity Properties
You can customize detail view layout in the following ways:
- Hide and Show Properties
- Group and Ungroup Properties
- Move Group of Properties and Single Property
- Resize Property and Lock Property Size
- Add Tabbed Group
- Add New Tab
Hide and Show Properties
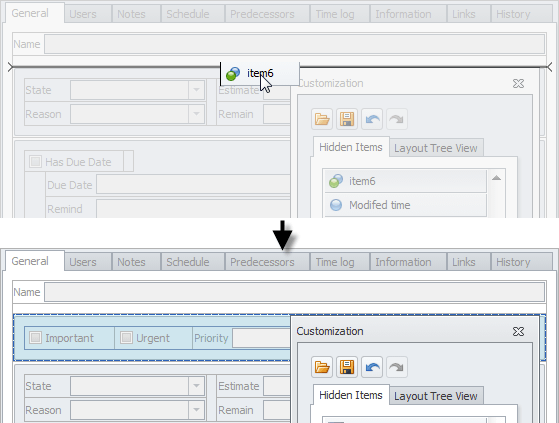
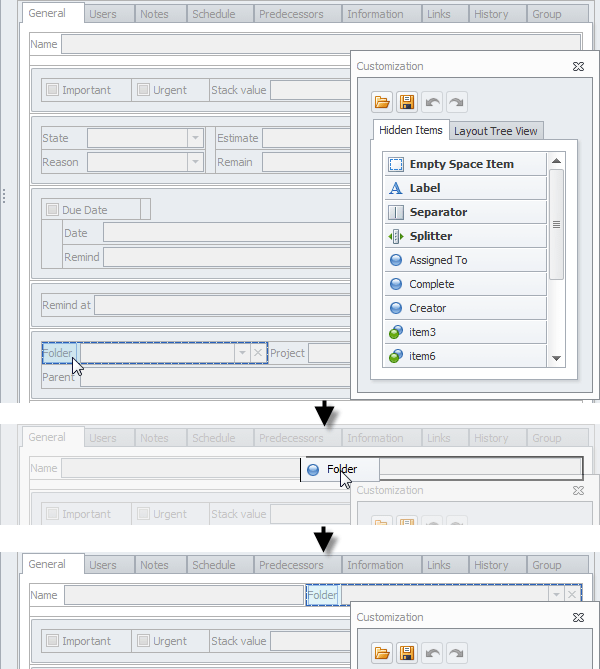
To hide a property or a group of properties from the view, click the property or the group, and then drag it to the Customization dialog box.
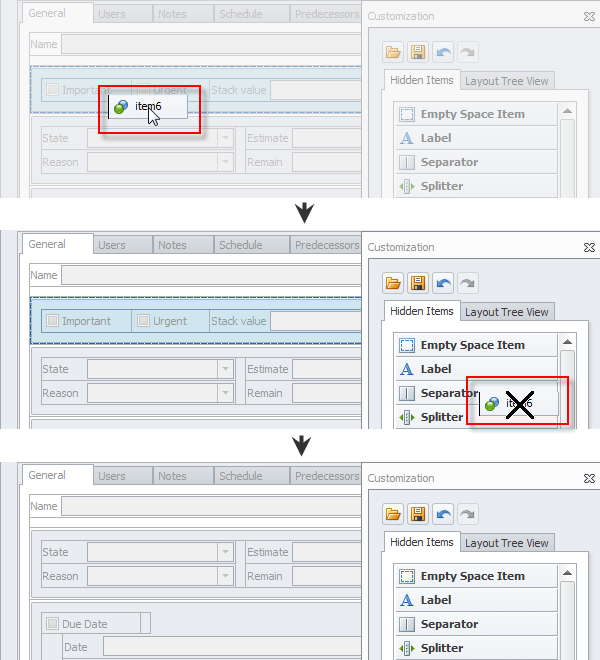
To add a single property or a group of properties, click it in the Customization dialog box, and then drag it to the view layout.
Group and Ungroup Properties
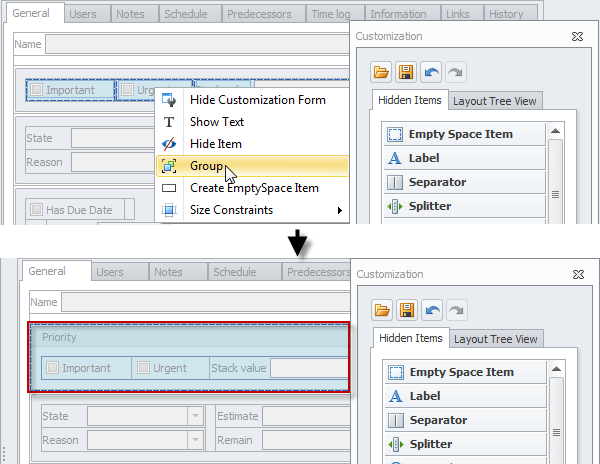
To unite several properties into a single group, click these properties one by one, right-click the selection, and then click Group.
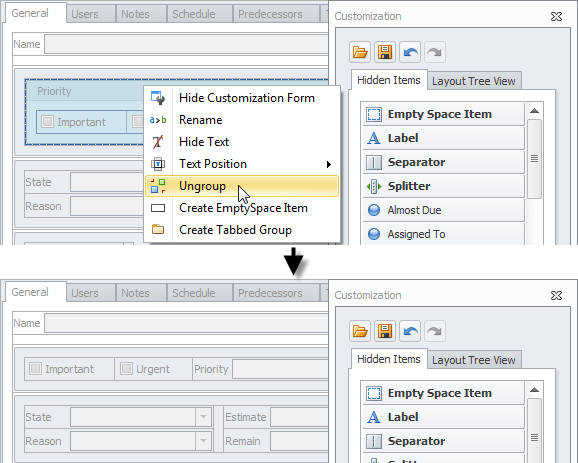
To disunite properties, right-click the group, and then click Ungroup.
Move Group of Properties and Single Property
To move a group of properties to another place in the view, click the group and drag it to a new place.
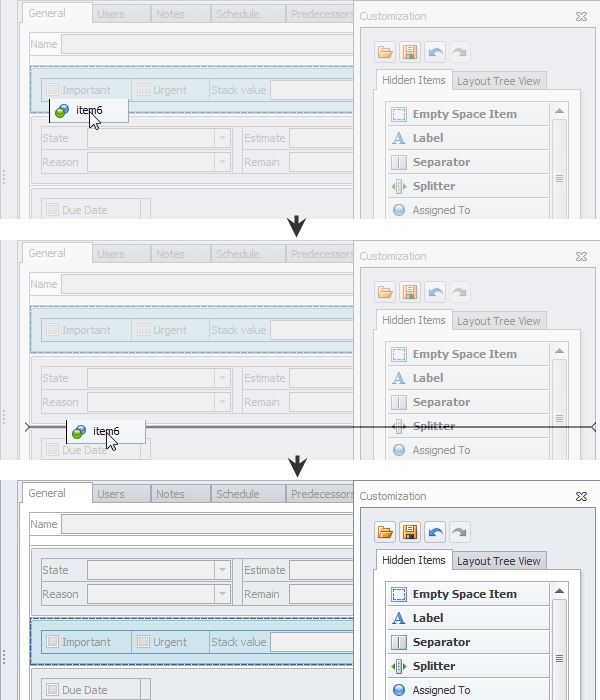
Note The same way you can move a single property to another place.
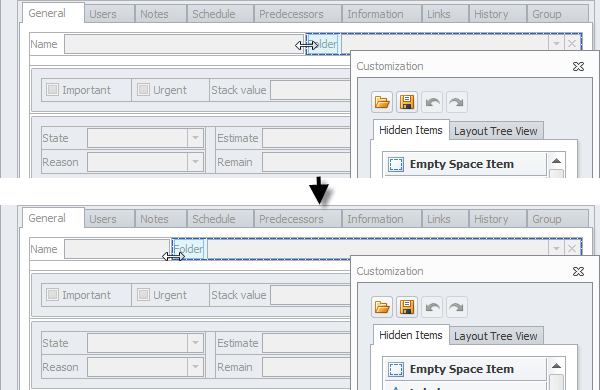
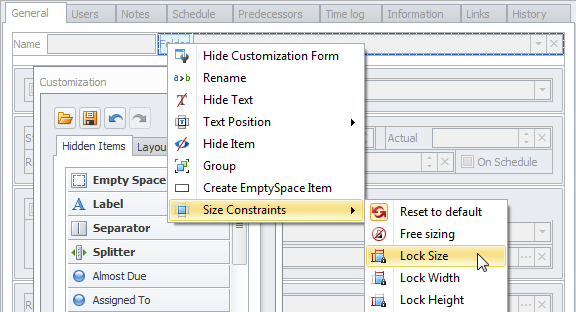
Resize Property and Lock Property Size
To resize property, click it, and then drag appropriate border to required position.
To lock property size, right-click the property, point to Size Constraints,and then click Lock Size.
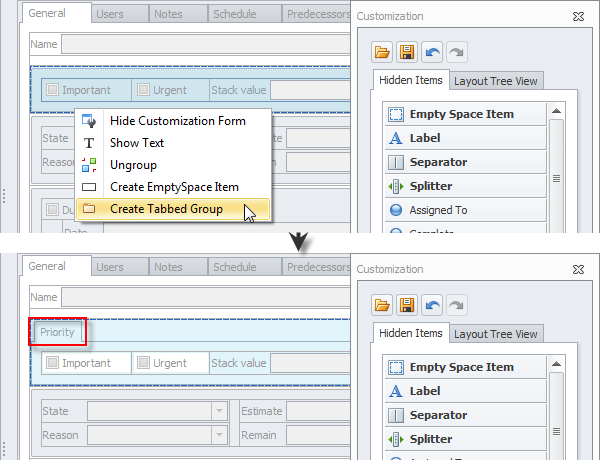
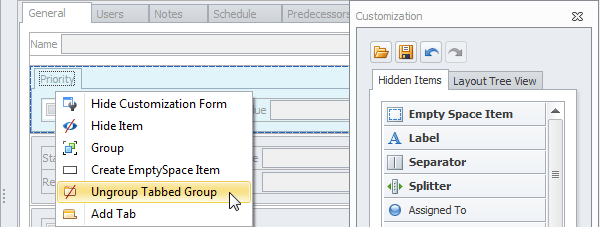
Add Tabbed Groups
To turn a group of properties into a tabbed group, right-click the group, and then click Create Tabbed Group.
To disunite a tabbed group, right-click the tabbed group, and then click Ungroup Tabbed Group.
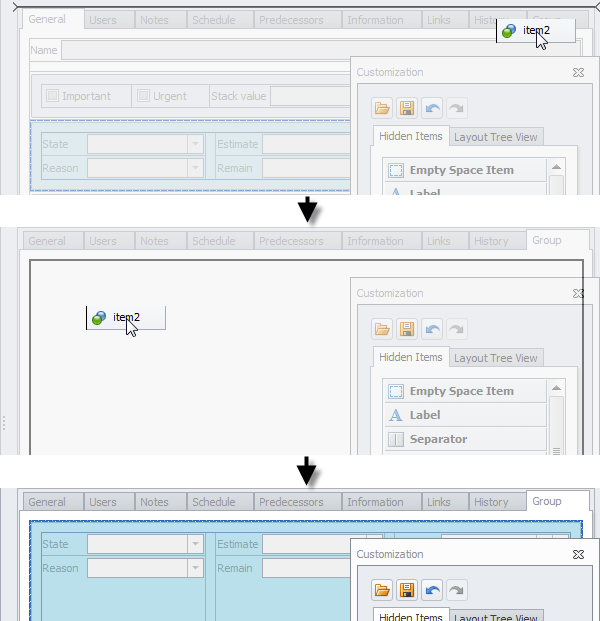
Add New Tab
To add a new tab, right-click empty space in theview, and then click New Tab.
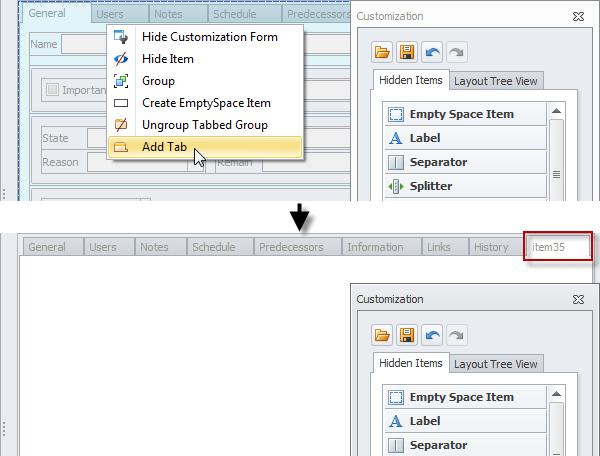
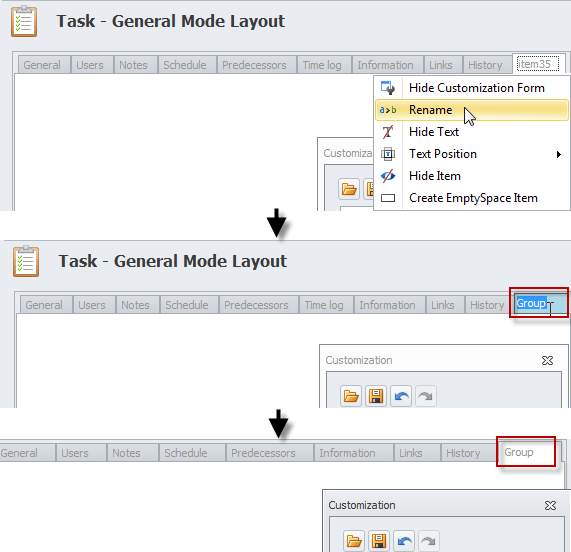
To rename a tab, right-click the tab, click Rename, type required name, and then press Enter.
To add new items to the new tab, drag properties from the Customization dialog box or any other tab to the new tab.
Design Elements
You can add the following design elements to the detail view:
Empty Space
To add some empty space between properties, drag Empty Space Item from the Customization dialog box to required place in the detail view.
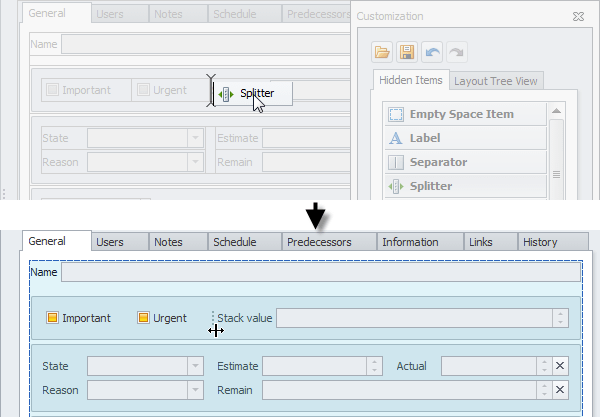
Splitter
To add a floating boarder between properties, drag Splitter from the Customization dialog box to required place in the detail view.
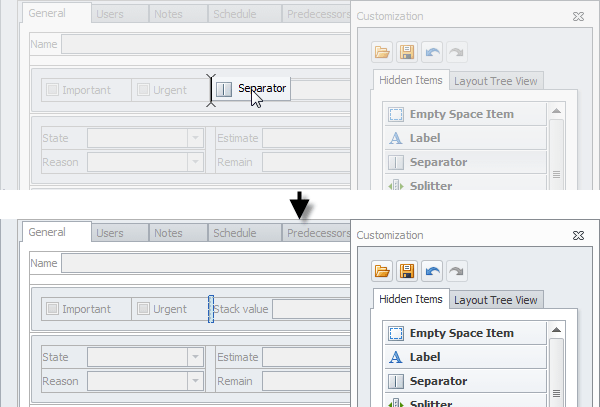
Separator
To add a fixed border between properties, drag Separator from the Customization dialog box to required place in the detail view.
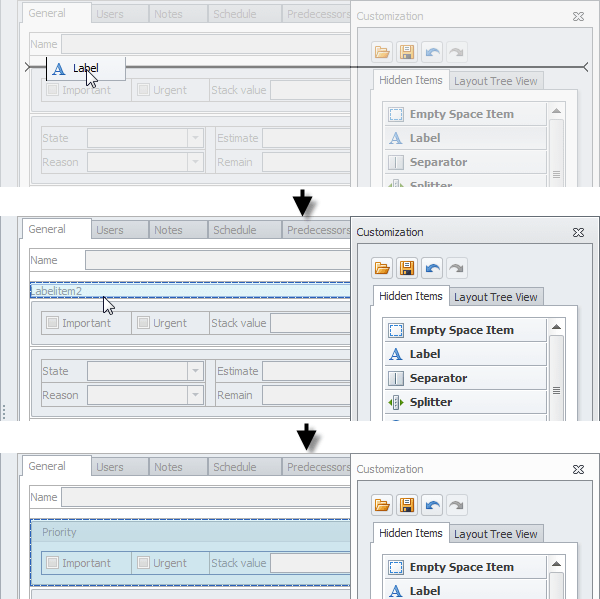
Label
To add title to a property or a group of properties, drag Label from the Customization dialog box to required place in the detail view, and then type required title name.