How to Set shared buffer folder
You must set shared buffer folder to backup and restore CentriQS databases of the MS SQL Server type. CentriQS Server and MS SQL Server use this folder as temporary storage space for backup and restore operations.
Step 1. Create a shared folder
Step 2. Set the shared folder in Configurator
Create a shared folder
You can create a shared folder on computer where CentriQS Server or MS SQL Server is installed.
To share a folder
1. Right-click the folder, and then click Properties; in the folder Properties dialog box, click the Sharing tab, and then click Share.

2. In the File Sharing dialog box, click the down-pointing arrow in the empty text box, click Everyone, and then click Add; right-click Everyone, click Read/Write, and then click Share.
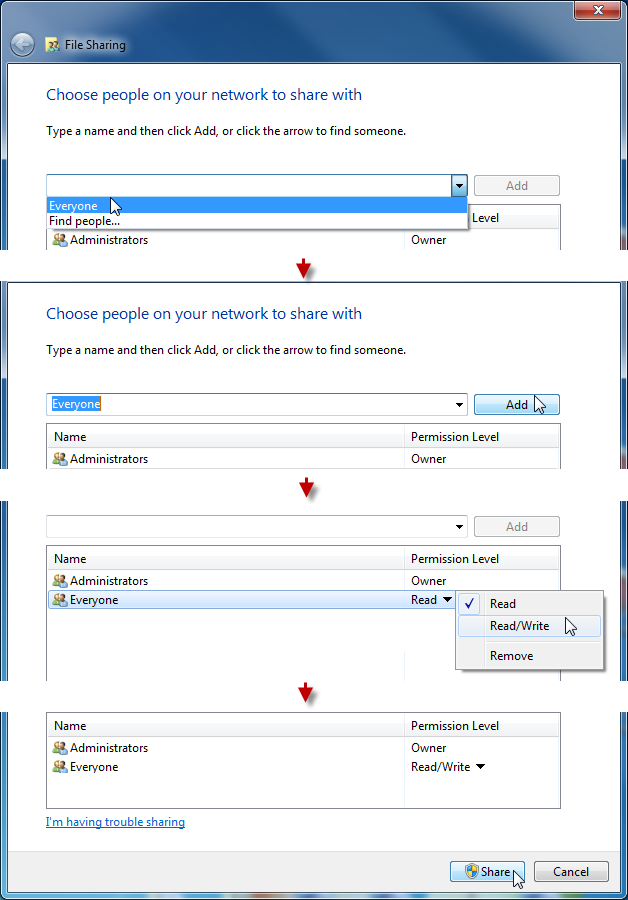
Note If you don't want everyone to have access to the shared folder, you need to grant read/write permissions only to user accounts which CentriQS Server and MS SQL Server are logged on as.
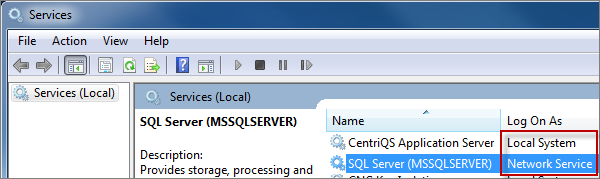
To check what user accounts CentriQS Server and MS SQL Server are logged on as
- Click Start, click Control Panel, click Administrative Tools, double-click Services, and then check what user accounts are specified in the Log On As column next to CentriQS Application Server and SQL Server (MSSQLSERVER).
Set the shared folder in Configurator
You can set shared buffer folder on any computer where CentriQS Configurator is installed.
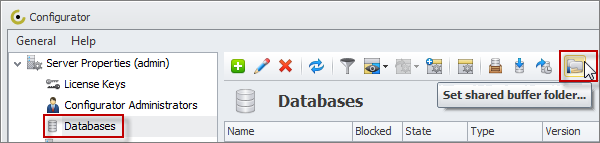
To set shared buffer folder
2. Click Databases, and then in the Databases toolbar, click Set shared buffer folder.
3. In the Shared Folder dialog box, enter the path to the shared folder in the text box, and then click OK.
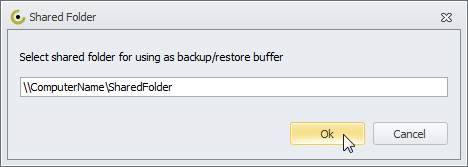
Note If CentriQS Server and MS SQL Server are installed on different computers, you must enter the path to the shared folder in the following format: \\ComputerName\SharedFolder