Issues Database Template: Issue Form
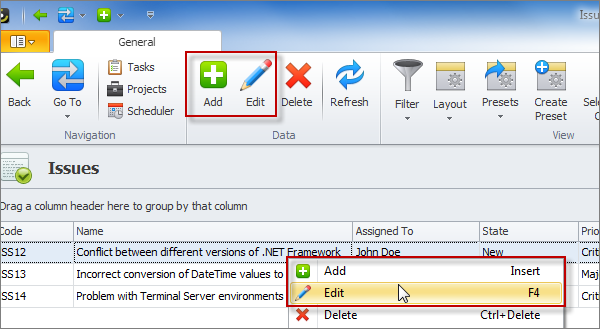
The Issue form appears when you add a new issue or edit an existing issue. You can create a new Issue by pressing Insert key or clicking Add on the ribbon or in the shortcut menu. To view the details of an existing issue you can open the Issue form by double-clicking the issue in the list or clicking Edit on the ribbon or in the shortcut menu.

General Tab of the Issue Form
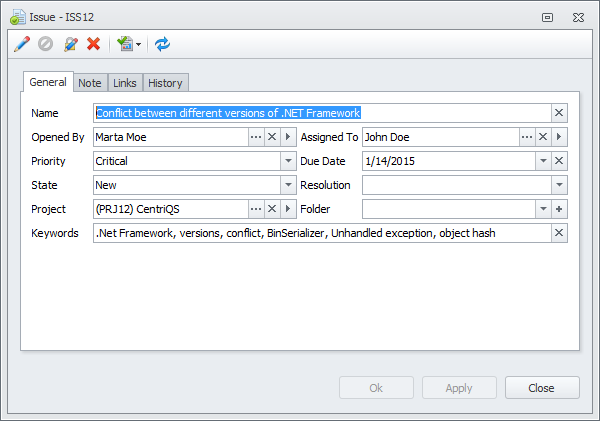
On the General tab of the Issue form, you can fill in the information that you have about the issue. Besides issue name, you can define issue priority, set the date by which the issue should be resolved, and specify who opened the issue and who is assigned to solve it. Keywords can help you find this issue later, so you can type the words that you might use to search for this record.

Keep Track of Closed Issues
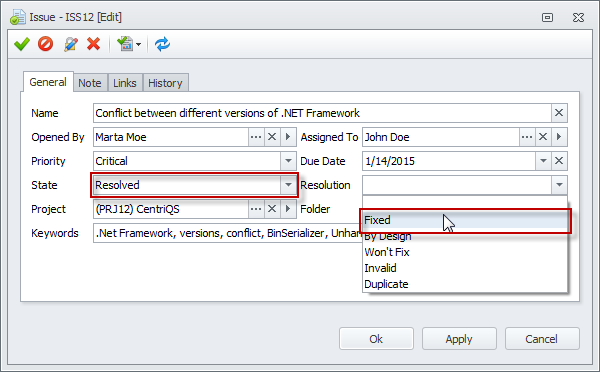
You can keep track of closed issues by changing value in the State box. To close an issue, double click it, and then change the issue state from Assigned to Resolved. You also need to select a resolution from the Resolution list.

Add Detailed Information
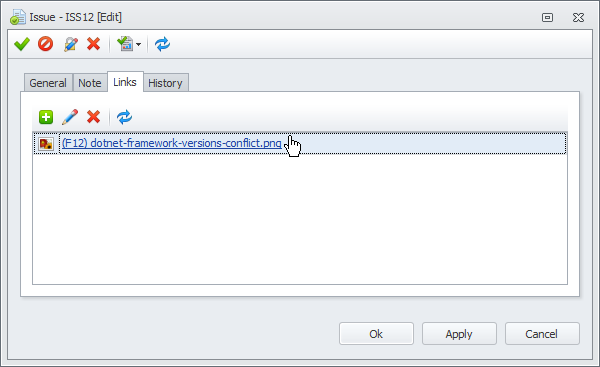
You can use other tabs in the Issue form to add detailed information about the issue. You can type a short description in the text box on the Note tab. In the Comment box on the History tab, you can type comments that are automatically stamped with your user name as well as date and time. On the Links tab you can associate this issue with other issues that you think are related. Also if you have a screenshot or a document that you want to attach to particular issue, you can click the Links tab, and then add the files that you want.

Prev.: Issues List || Next: Issues Reports
Next steps
{
Check out CentriQS FEATURES & SCREENSHOTS
Watch 7-minute CentriQS VIDEO OVERVIEW
Learn how to use CentriQS in KNOWLEDGE BASE
DOWNLOAD CentriQS 30-day Free Trial Version
CONTACT US to get help with CentriQS Database Design & Configuration